1 | 2 | 3 | 4 | 5

My store

Installation Instructions

The following is a guide that covers how to set up your new Lumiere template on your Joomla! site. Here you can find an overview of the files included in the Lumiere release and instructions on installing and activating the template in your Joomla! install.

Note: The Bundle Template is only necessary if the Gantry Library is not installed at /libraries/gantry directory.


Step 1 - Installation

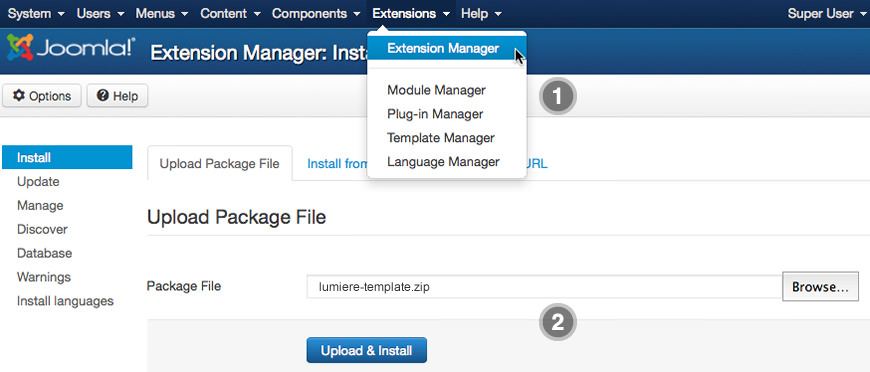
  1. Install from Admin → Extensions → Extensions Manager
  2. Browse for rt_lumiere.zip and click Upload & Install
Image

Image
 

Step 2 - Template Default

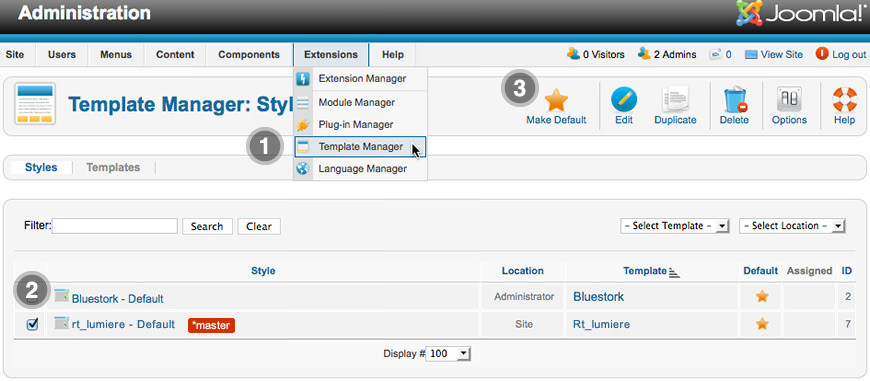
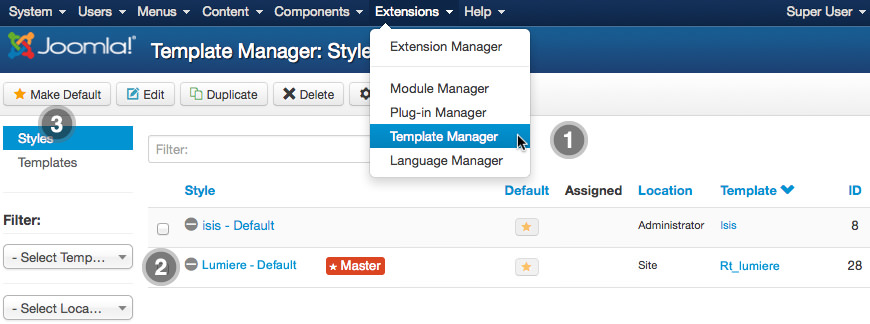
  1. Make the template default at Admin → Extensions → Template Manager
  2. Select rt_lumiere
  3. Press Make Default
Image

Image
 

RocketLauncher Instructions

We always recommend installing a RocketLauncher first to trial and understand the template more effectively. It must be installed as new, and not over an existing Joomla install.


Step 1 - Upload

  • Download the RocketLauncher
  • Unzip the file
  • Upload the created folder to your server

Note: You can upload all the files via FTP, or use cPanel or SSH to upload the zip and unzip directly onto the server. Enquire with your hosting provider.


Step 2 - Installation

  • Go to www.yoursite.com/*folder name*
  • Follow the Installation instructions
  • Ensure you click Install Sample Data during installation
  • Remove the installation folder in the Installation interface

Injected Features

Non-Standard Elements
 

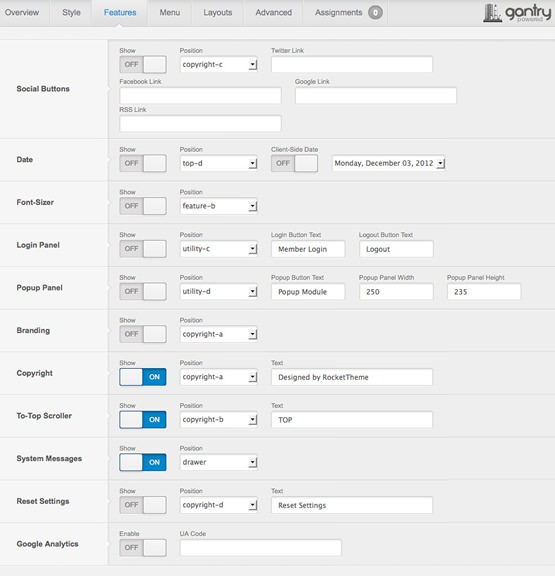
There are Features that are injected into a position when enabled, and are stacked vertically; which includes: Social Buttons, Date, Font Sizer, Login Panel, Popup Module, Branding, Copyright, To-Top Scroller, System Messages, Reset Settings, and Google Analytics.

Collapsible

If no modules are published to a position, the entire area or row will not appear or collapse.

Grid Sizes

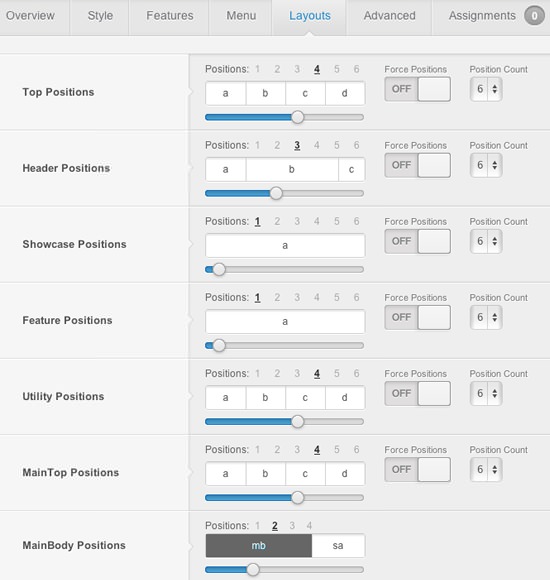
Configure at Admin → Extensions → Template Manager → rt_lumiere, then go to Layouts to set the grid widths and allocated positions.

By default, each grid is given an equal distribution, but this can be modified to a custom distribution between modules, such as 3/4/5 instead of 4/4/4. These options are available for when 2-6 modules are present.

Gantry Grid

Configure at Admin → Extensions → Template Manager → rt_lumiere, then go to Layouts to set the grid widths and allocated positions.

image

Forced Positions

Hay momentos en los que simplemente no desea que sus módulos ocupen todo el espacio en una fila horizontal, sin importar el diseño. Por ejemplo, es posible que desee tener un módulo a la izquierda y un módulo a la derecha, sin nada en el medio.

Esto se simplifica con el parámetro Gantry Force Positions para cada diseño, lo que le permite establecer el recuento en una fila específica, como 4, incluso si 4 módulos no están publicados para esa fila.

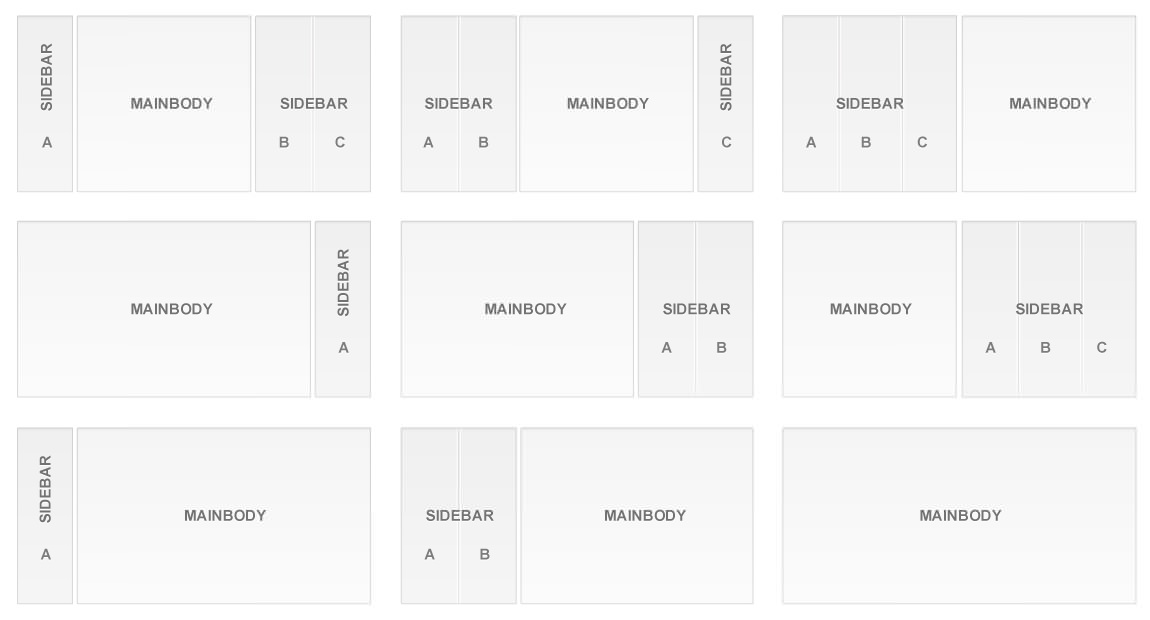
MainBody / Sidebar Layouts

Configure en Admin → Extensions → Template Manager → rt_lumiere , luego vaya a la pestaña Layouts y configure las diferentes posibilidades de diseño de Mainbody / Sidebar.

imagen
imagen
imagen


Nota: Si no se asignan módulos a las posiciones de la barra lateral, el cuerpo principal se convertirá en ancho completo.

Posiciones del módulo

Copyright © 2022 eminentfx. Todos los derechos reservados.